Kitchen Detail 2006
HERE'S THE PLAN FOR THE KITCHEN:
Remove flooring,
countertops, one window and old island.
Add additional cabinets, new island, hardwood floors and granite
counters.
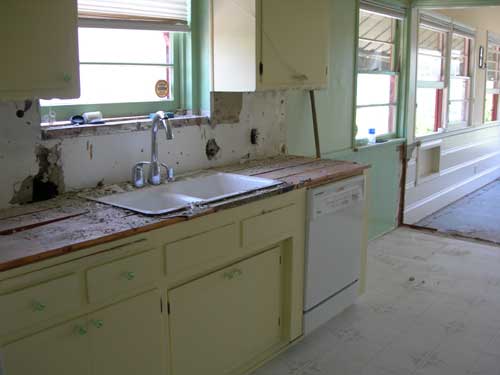
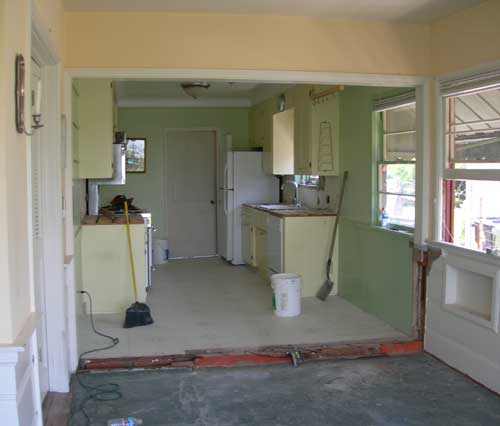
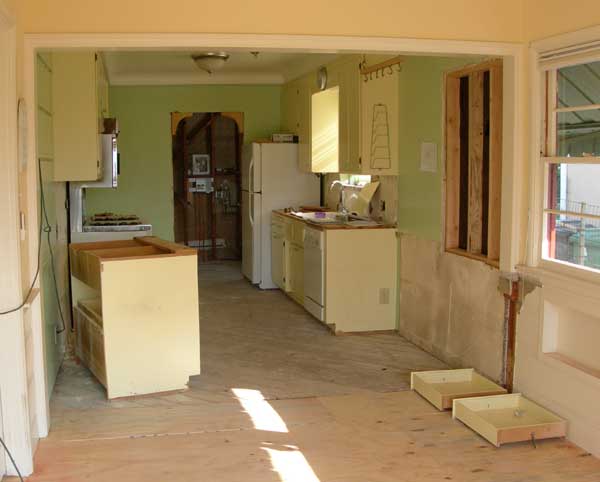
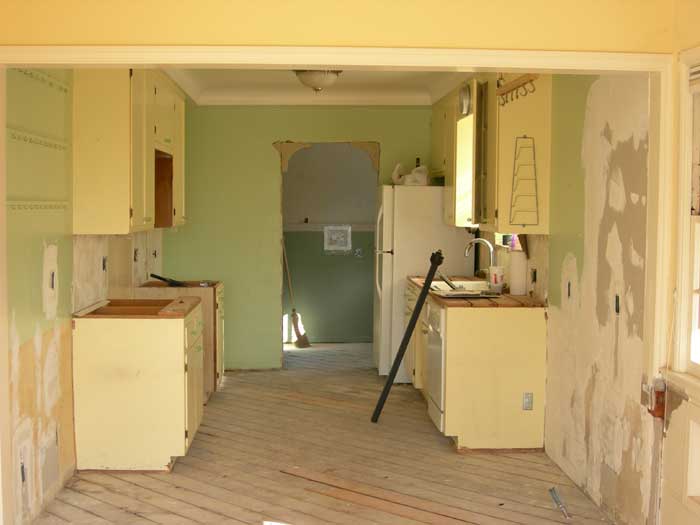
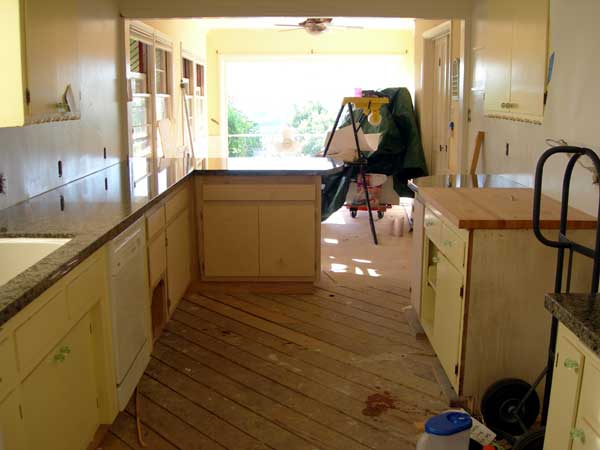
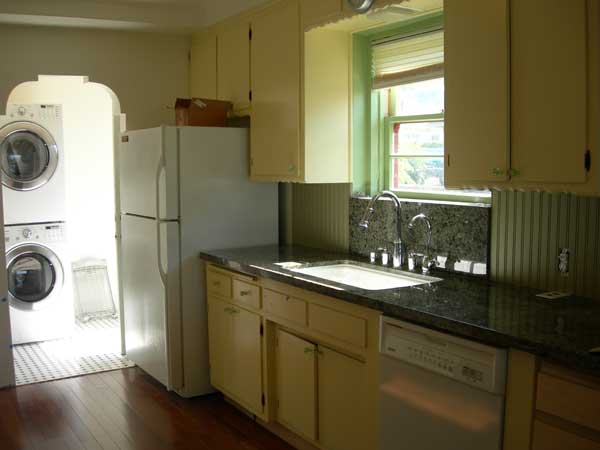
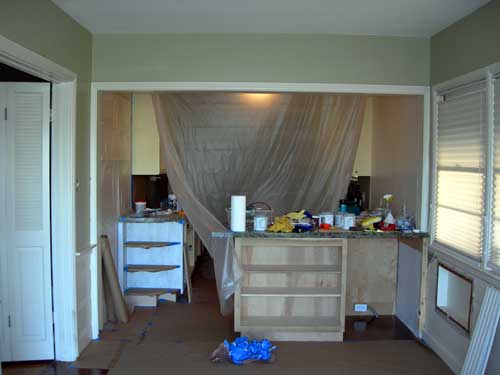
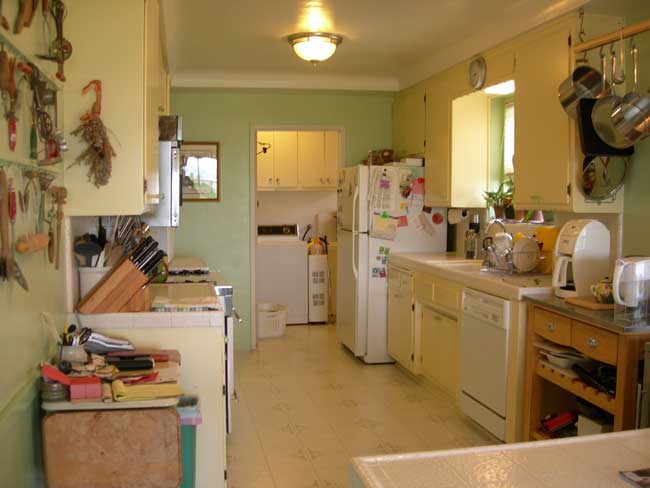
KITCHEN-BEFORE:

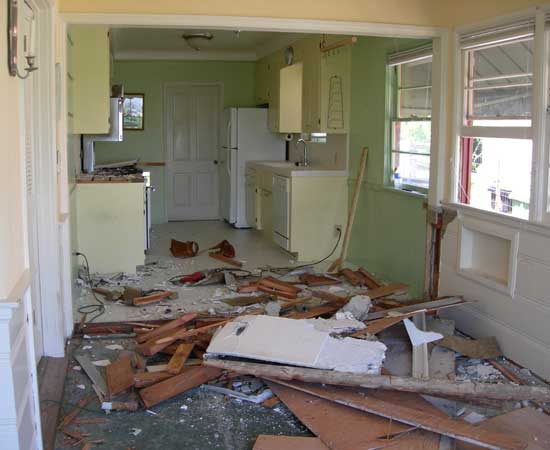
KITCHEN DURING DEMOLITION
AND RECONSTRUCTION
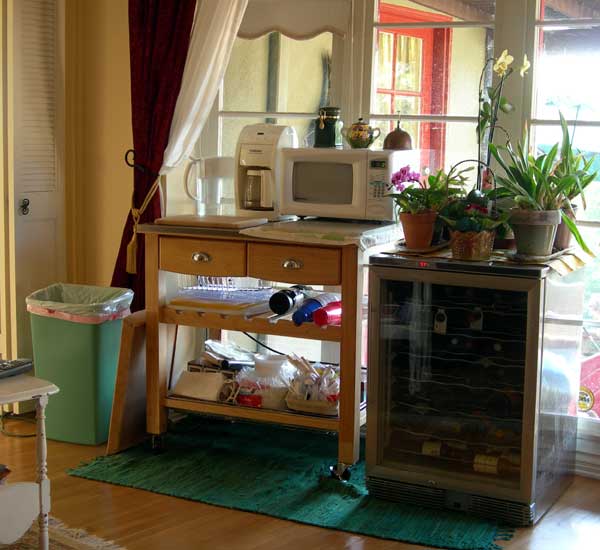
TEMPORARY "KITCHEN" IN
LIVING ROOM-
(Note the "important" things-coffee maker and wine 'fridge)
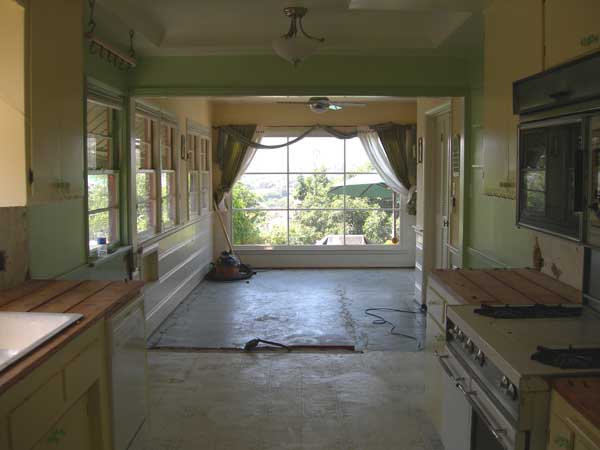
RECONSTRUCTION WEEK 1
Window
has been removed and old vinyl flooring removed down to sub floor.
Living
room floor has been raised up to meet the rest of the house resulting
in
having to cut down door to back patio by almost 3 inches!
We also moved one of the cabinets to see if we could make room
for a
new/vintage stove (all we need is 3 more inches).
July
14th:
Notes- All good so far, mostly. Flooring issue-we wanted 3/4"
solid hardwood (teak). if we install that in the kitchen it will be
too "high" vs. the rest of the house since there is only 1/2" difference
between the old hardwood floors and the sub flooring. So, now looking
at using 5/16" solid BR-111 hardwood. It's not a laminate, and not engineered,
it's solid, but it's really thin.
Considering a corner pedestal sink for the powder room, but having
a hard time finding one I like.
We're going to look at granite and hardwood this weekend.
July
17th
Ok, so, here's the granite we think we've chosen. It's called "
Verde Ventura":
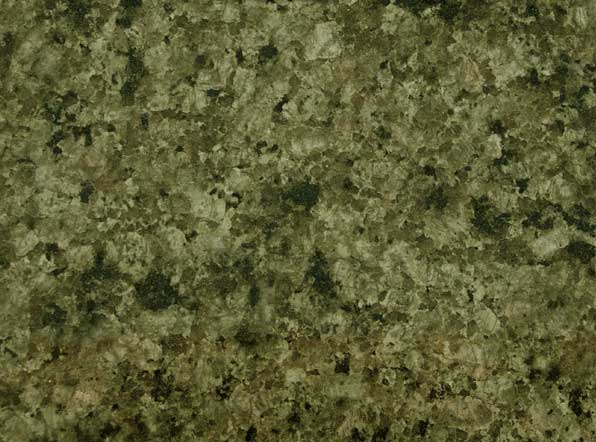
It's
a little more grey and olive green than this photo and a little lighter
as well. We went and viewed the slabs in a granite yard in Sunland in
100+ degree heat! Now we just need to find an installer.
For
the flooring, we've decided to go with BR-111 solid 5/16" hardwood Teak.
Although it's much thinner than standard 3/4" hardwood, it will
allow us to remain relatively flush with the level of the rest of the
house. Plus, it's much less expensive than the 3/4" hardwood and more environmentally
friendly because it uses less trees. Here's a link to the BR-111 site
where you can see a photo of the flooring.
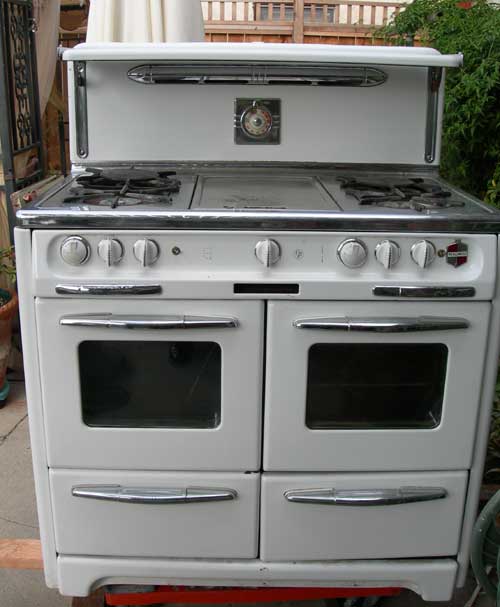
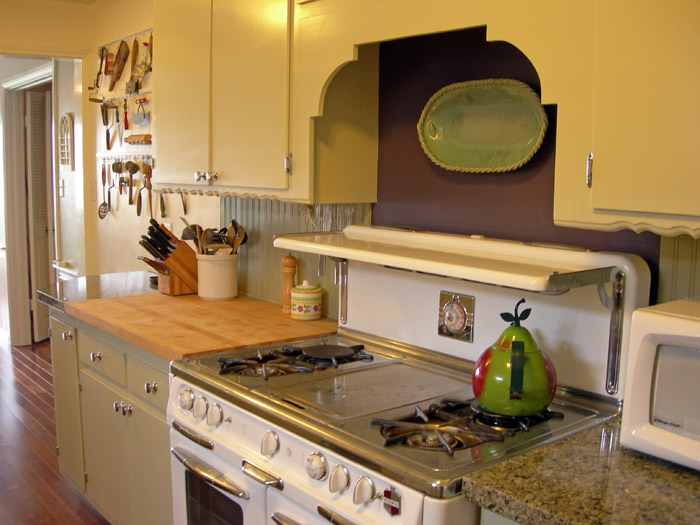
I also found my stove!! After months of looking on Craig's List, I found my 1950's Wedgewood double oven for only $300. The catch was that it was in San Diego, a 300 mile round trip from us! It needs some work, but local vintage appliance stores sell this same stove (albeit fully restored and re-chromed) for $5500 and up!
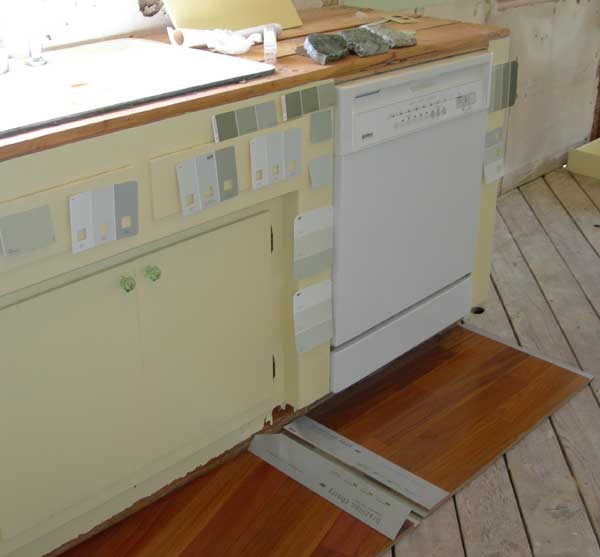
Below;
Help! I have too many samples!
New
questions to ponder....
Should
we replace the kitchen sink and/or faucet? The sink is in decent shape,
but will we regret it after the granite is installed and it's too late?
Should we have tile (ceramic/stone/slate) in the laundry room and
powder room? I'm concerned about high traffic (via exterior side door)
and possible water damage to wood if the washer or toilet were to leak.
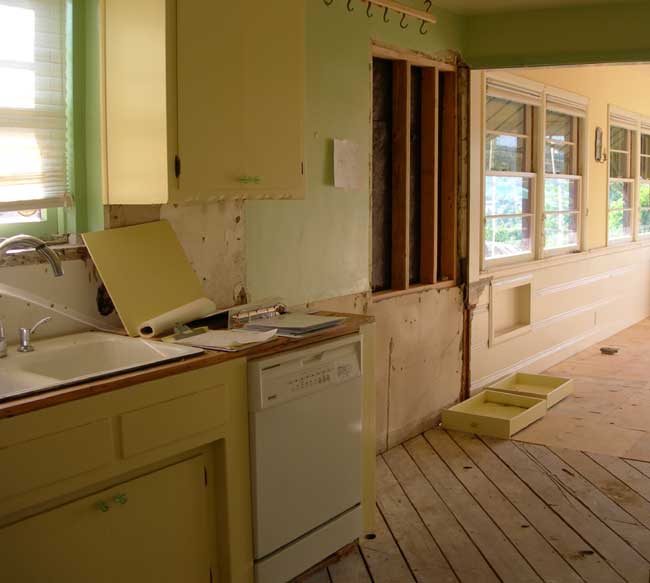
RECONSTRUCTION
WEEK 2

Kitchen
mid week 2.
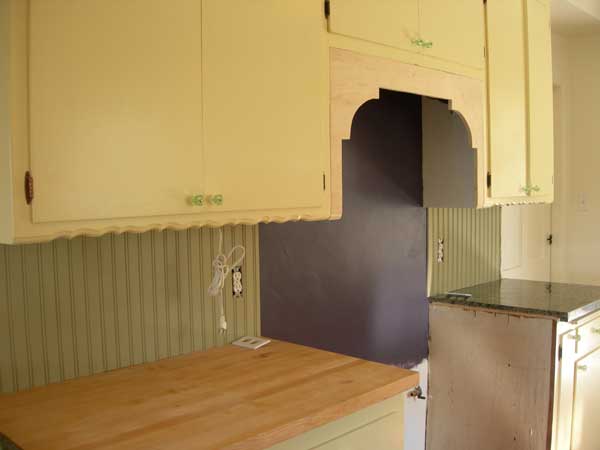
The monster stove has been removed and the window has been walled
up.
We had to move the existing cabinets to make way for the new stove
(about 1.5 inches per side).
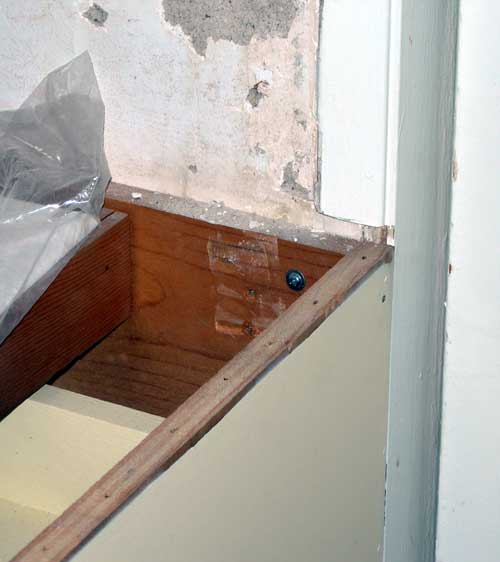
Below is a detail of how we had to remove the door frame to gain
those extra inches.
Kitchen end week 2.
July
22nd-
We bought our granite today! Yes, it's the one pictured above. Unfortunately,
because of the configuration of the countertops, we needed to buy 2 full
slabs, so it looks like we'll have some pieces left over. David has been
interviewing fabricators/installers. We're thinking about using a piece
on the windowsill above the sink because we usually have it covered in orchids
and it tends to get wet. I was also thinking of going up the entire back
of the sink to the window ledge with the granite, but nowhere else.
Considering
beaded board for the rest of the backsplash.
Week 3&4 Update:
Aug
2nd-
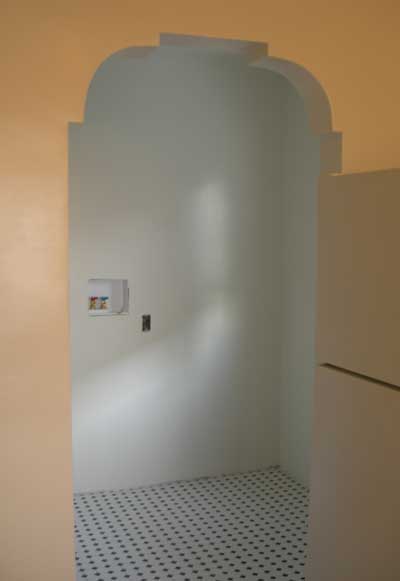
All the drywall is done and the new archway into the laundry room
looks great and matches perfectly the original ones in the Living Room
(and the one we had put in the shower).

I've painted the walls of the kitchen the same color as all the other trim in the house. It's an off white that apears much brighter next to a color (Behr "Subtle White).
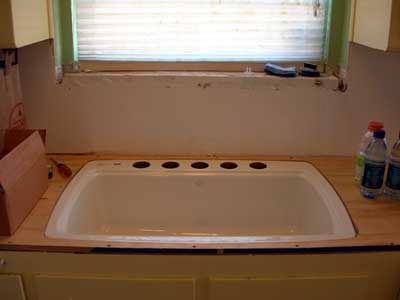
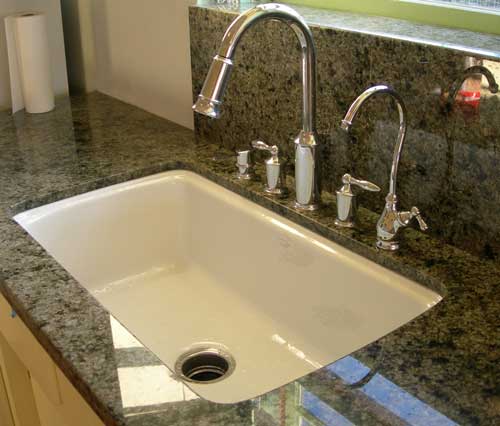
I
decided I would probably regret it if we didn't change out the sink so
I splurged and got exactly what I wanted; a large single bowl (Kohler "Cape
Dory"). What's nice is that with the undermount sink comes 5 holes which
will allow us to add a filtered water faucet as well.
The
faucet I chose is the Moen "Aberdeen" with a pull out function and two
handles. I also ordered the matching soap dispenser the filtering system.
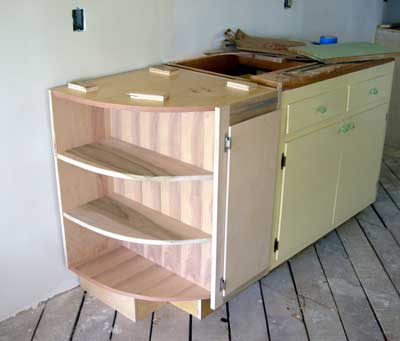
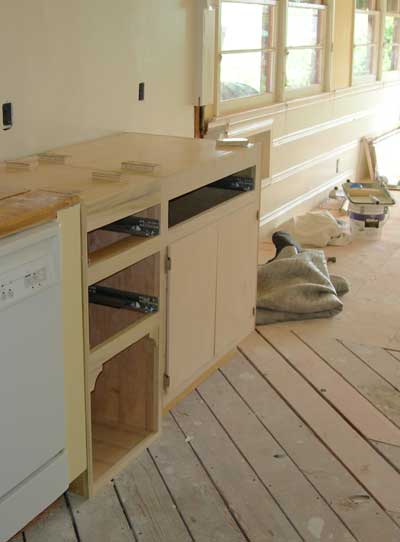
The cabinet maker delivered some of the cabinets yesterday with more
coming hopefully today.
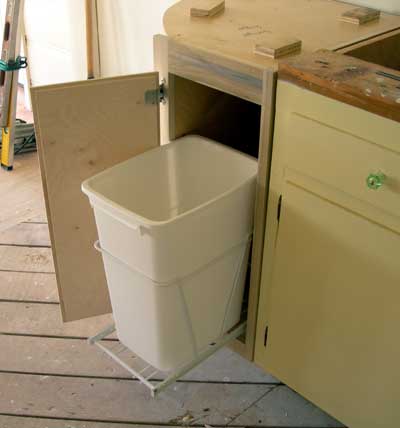
Here is the small cabinet with trash bin for next to the stove.
Week 5 Update:
August
8th-
It's never easy, is it?
We ordered our hardwoord flooring last week from a local distributer
who told us it would be here in 3-4 days. He called 2 days later and said
it had to be shipped from Brazil and would be 3-4 weeks! He offered
us a solution after speaking to the manufacturer, the Tiete Chestnut instead
of the Teak, for a slightly reduced price. Fine. I may even like it better.
The rest of the cabinets have been installed in the last couple of days and I've done more painting.
Archway
into the laundry room:
New
sink.
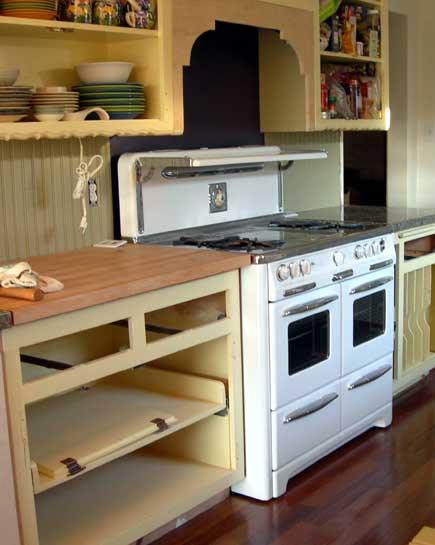
Butcheblock prep area next to stove:

Butcher block above is another Craig's list find. I bought a 9 foot piece of countertop from someone who had torn it out of their kitchen for $25. My mother then sanded it down and had to cut a 1" strip (glued to the back) to make it deep enough. Similar pieces of butcher block new sell for $400!
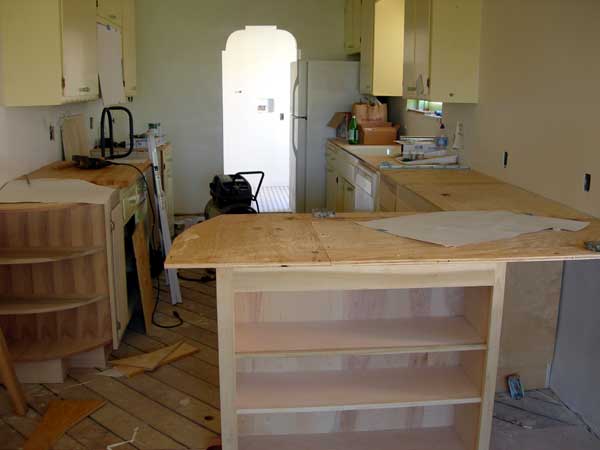
New
cabinets with plywood top
(waiting for granite):
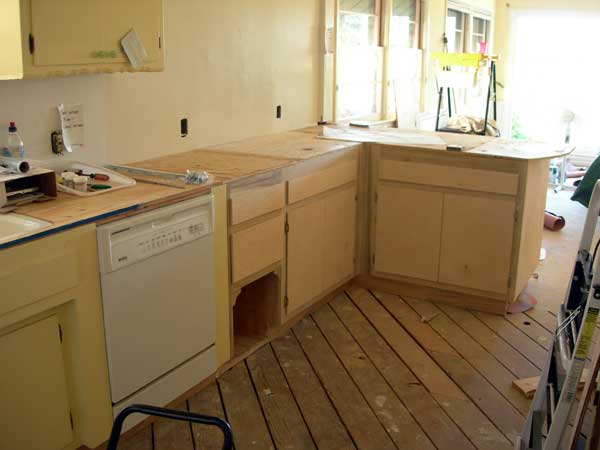
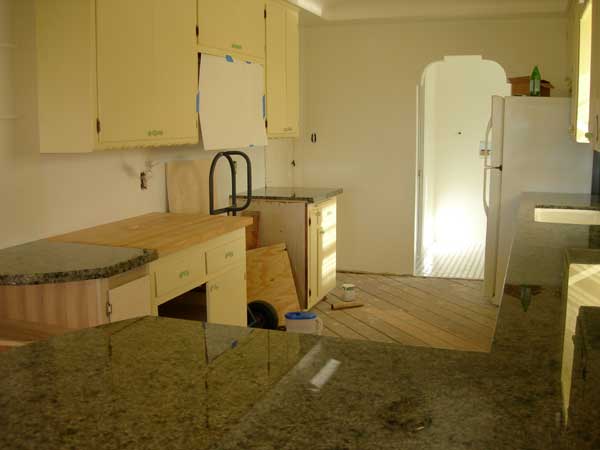
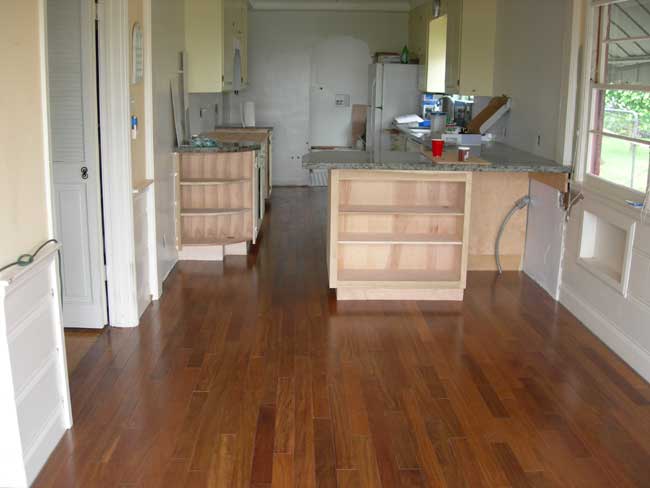
View from Dining Room.
Wine refrigerator will go in corner next to bookcase.
August
10th-
Got
our granite today!
It looks much
lighter in direct sunlight than it does in these pictures.
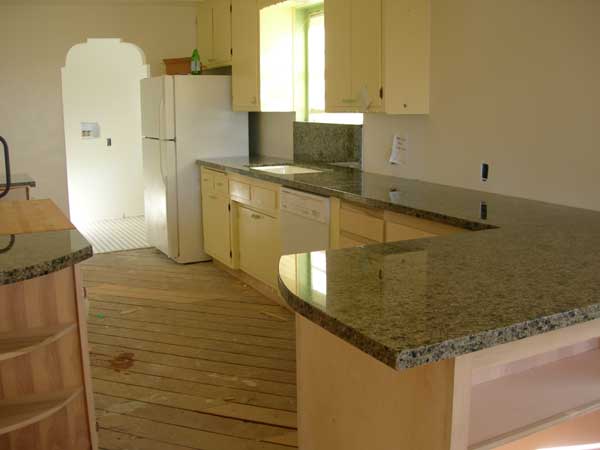
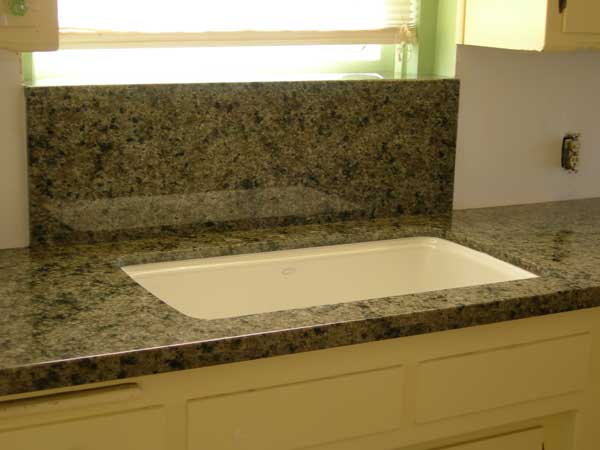
Below, the granite goes begind the sink and covers the
window sill. We like to keep orchids here so it's great that
it will now be more water resistant.
Week
6
August 14th-
Below, the new flooring is in....
August 17th
Below, the kitchen sink with faucets installed.
Week 7
August 20-
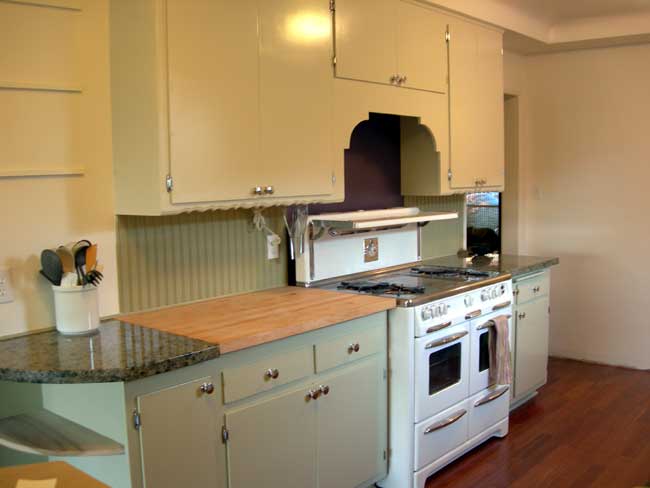
Today we installed the beadboard backsplash ourselves along with an arched cut out to hide the fan over the stove. The cabinets and window frame still need to be painted.
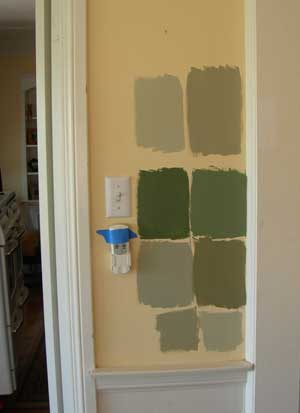
It took me 10 color samples of paint to find the right greens for the cabinet and backsplash.
All paints are Sherwin-William's Martha Stewart line in oil based enamel.
The top cabinets will be a grey-green called "Perry Grey".The bottom cabinets are a darker grey-green called "Silt".The backsplash is an even darker green called "Pheasant"The "aubergine" color behind the stove area is one I mixed myself and is temporary until we decide what we are going to do there.
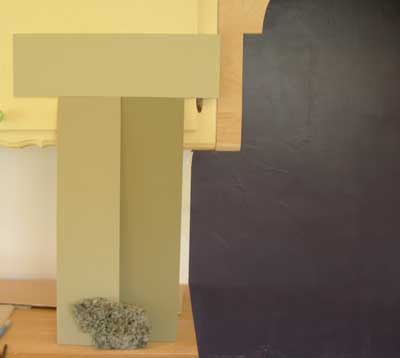
Cabinets not yet painted in photos above.
Week
8
August 28:
There is still so much to do, all of it detail work which we will do ourselves.
Most of it is painting (kitchen cabinets and walls) and mouldings (floors,
counter trim, bead board panels in dining room).
The stove is now in place. Cabinet doors are off in preparation for painting.
Week 12
November 8:
Finally! We are almost finished! Almost, because there is still some touch
up work to do.
We decided to paint the cabinets ourselves and install all the mouldings
and wainscoting.
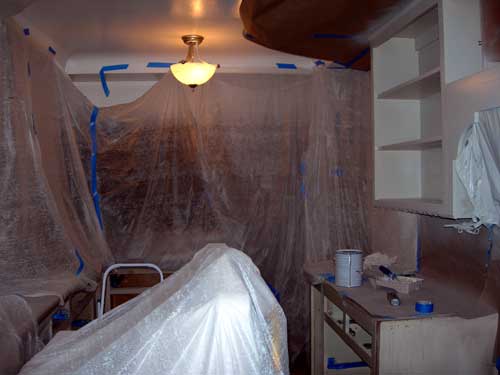
Who knew it would be such a lengthy process?
First, we had to mask
off the kitchen from the rest of the house. Still, the paint got everywhere.
David
sprayed the doors outside and we brought them into the Dining Room to dry.
Everything needed at least 2-3 coats of paint plus 2-3 days of dry-time.
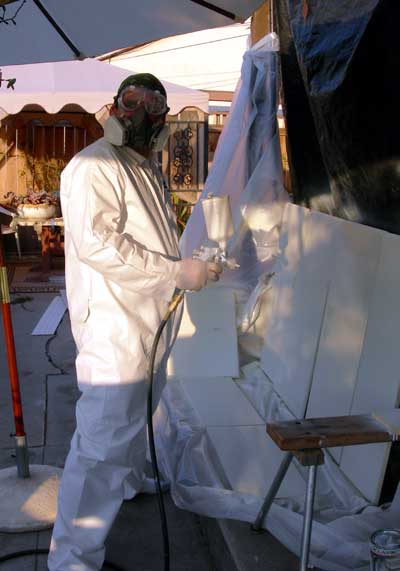
We
lived in the mess for weeks.
Below, the new chrome knobs.
We also replaced the hinges with new chrome ones and much to our dismay,
they did not fit perfectly. Many adjustments (including drilling new holes,
chiseling out part of the cabinet frames, and much swearing) were made.

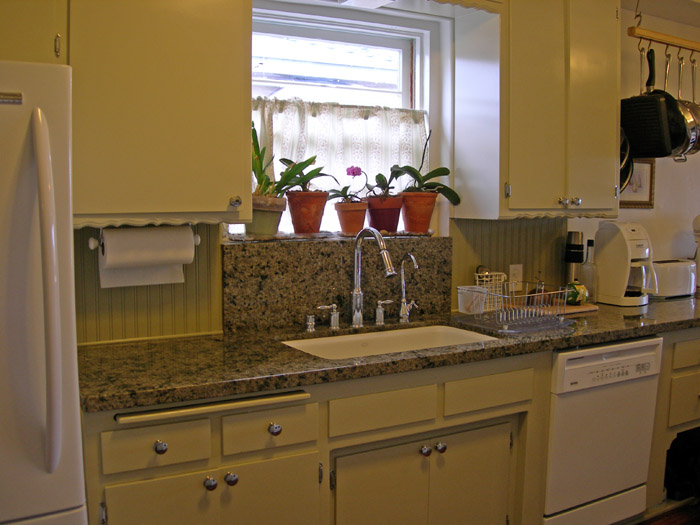
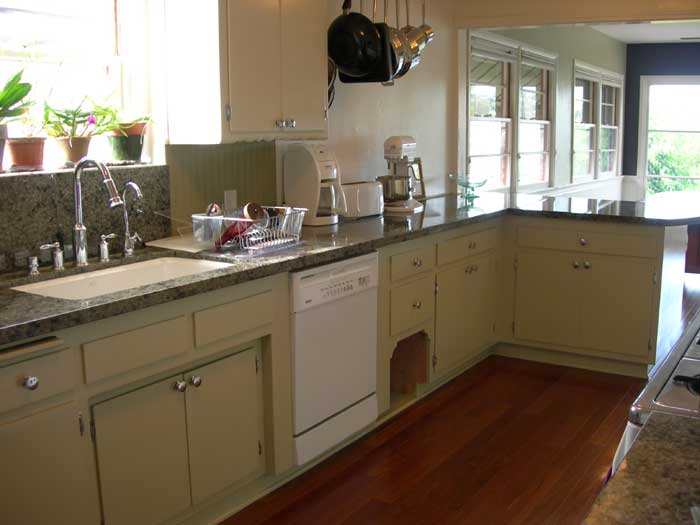
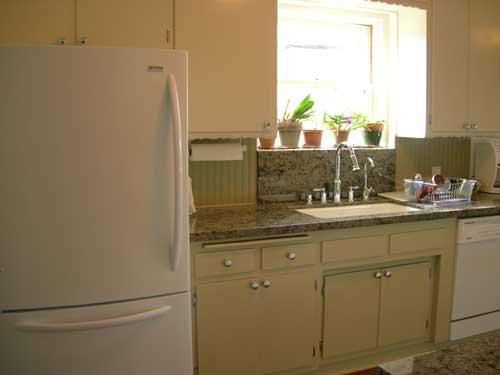
Below, the sink side
of the completed kitchen.
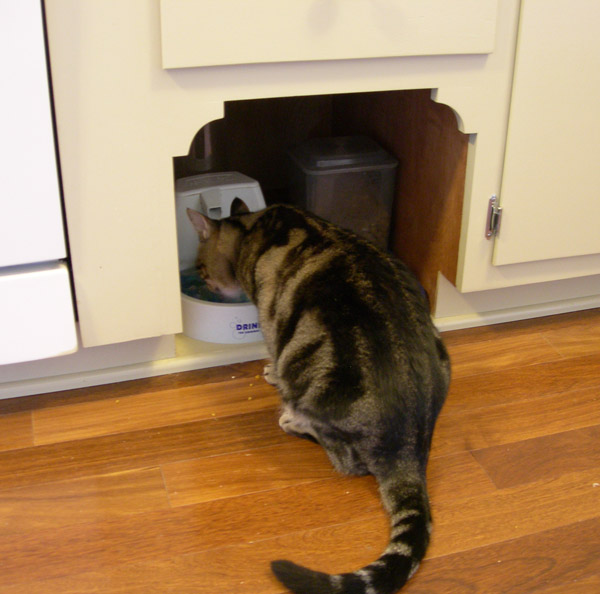
The empty cabinet space next to the dishwasher is where the cats food and
water bowls will go.
The new refrigerator
below.
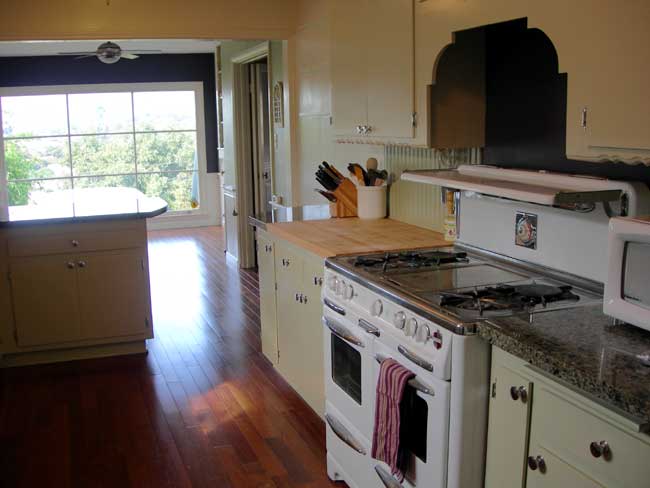
Below, the stove side
of the kitchen.
FINAL BEFORE AND AFTER:
BEFORE:
AFTER:
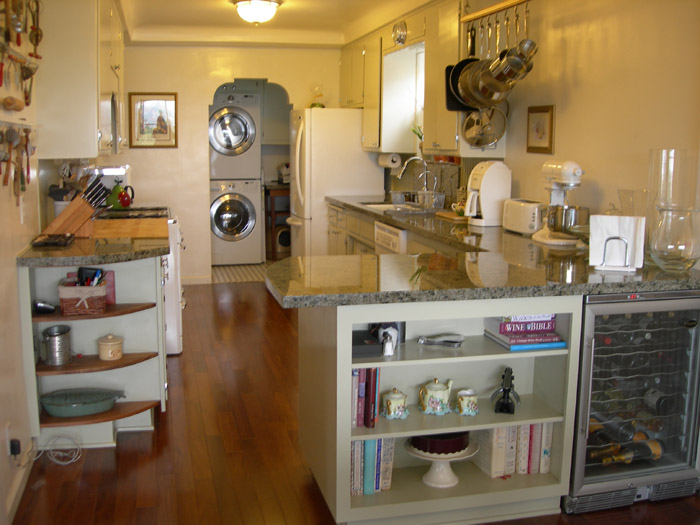
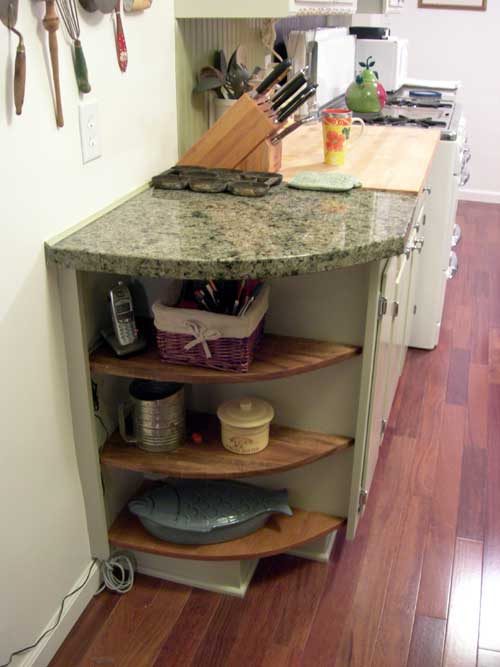
The
curved shelves in the kitchen have been stained to match the floor.
The
cats love their new "food niche"
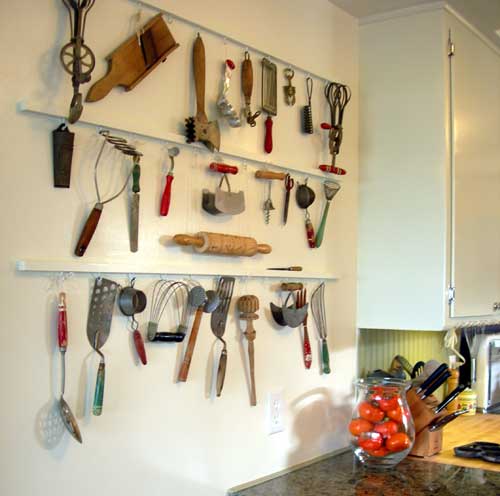
My
vintage utensils are back up on the wall.
Stove side of the kitchen

Sink side of the Kitchen